Hi,
It's been a while since my last blogpost. It's been a bit of a hectic period lately.
But not blogging doesn't mean not doing anything :) I've been working on some stuff which I'll blog about in the coming period. Like a deepzoom application for my aunt which enables her to show the bronze sculpture work she does in detail.
But for now, I want to tell you something about the ColorFillToy I (re)created. Thanks Terence for the challenge :) (http://www.shinedraw.com/animation-effect/flash-vs-silverlight-colour-fill-toy/).
Terence of Shinedraw.com created a colorfilltoy in Flash and mentioned he didn't have enough knowledge on Expression Design to create a similar application in Silverlight.
I can say the same, I haven't worked with Design much, but I tried to recreate the application using Blend.
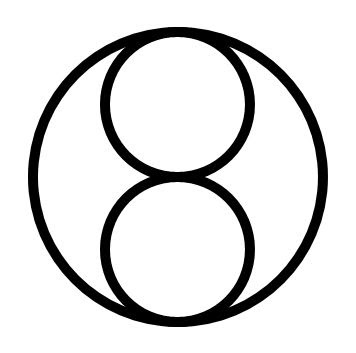
To achieve the shape I wanted, I created three circles. One large one and 2 smaller ones which I placed inside the larger one:
Now we need to remove the left half of the top circle and the right half of the bottom one. This is only possible if we convert the ellipse to a path object. You can achieve this by right clicking the object, choose the Path section and the Convert to Path option or by selecting the circles and choose the same option from the Object menu:
Now, by using the Direct selection tool (Shortcut key A in Blend) you can select parts of the ellipse which is now a path:
As said before, now delete the left part of the top circle and the right part of the bottom circle (or vice versa).
The shape you're getting now is exactly what you want.
Now, to create the fill ability I used wanted to use a clipping path so I need both of the shapes separately (the 2 halves of the yin-yang sign).
Next I converted the large circle to a path as well and copied it, and all of the other path's I created so far. We need to create 2 separate shapes, so the large circles need to be split up in 2 half circles. One left and one right side. You know the drill!
Visually there are no differences by making these changes, but you'll see next how these are really necessary to create the effect we need.
To glue the 3 shapes together (1 large half circle, and 2 smaller ones) we can use a compound path. Select the three paths, right-click and select Path, Make Compound Path:
Do the same with the other 3 shapes and we have our 2 halves of the yin-yang sign.
To make the filling effect possible we need to do 2 things:
1. Create a Canvas for the fill to be dropped on, make sure the Canvas has a fill, with the Alpha value of the fill set to 0% (not the opacity, but the alpha of the fill!)
2. Create a clipping path on the canvas to clip the ellipse if it gets any larger then the shape we had in mind.
To add the shape to a Canvas can easily be accomplished by right clicking the shape and selecting Group into, Canvas. Now a Canvas is created while the shape keeps its position and shape.
Creating a clipping path for this complex shape was a bit more difficult to achieve. At least the first time I tried :).
First, create a copy of the shape (the combined path). Now set the StrokeThickess to 0 in the Appearance section of the shape's Properties.
Next, by using the Direct selection tool make sure the shape surrounds the original shape:
Finally the path is ready to be used as a clipping path. Right-click the path and select Path, Make Clipping Path. In the pop-up that appears select the correct Canvas (Yin or Yang):
Note: When you notice a thin white line in the border you can adjust the path using the Direct selection tool. I cannot seem to get it aligned 100% accurately, even at 6400% zoom:
After creating these complex shapes, it's a piece of cake to create the small circles and the rectangle fill areas.
The end result should look something like this:
When creating these fillareas make sure they are prefixed with "fillarea". We are going to use this later on.
In the next part of this tutorial we'll do the coding. We can reuse a lot of the code Terence already created for us in his simple Silverlight version.
Hope this helps!
Sunday, January 25, 2009
Creating a ColorFillToy in Silverlight - Part 1
Subscribe to:
Post Comments (Atom)


Cool Tutorial
ReplyDeleteGreat Tutorial!!
ReplyDeleteI would like to see the coding as well!
Please let me know once you have finished, I will link to your blog!
Useful and splendid tutorial...
ReplyDeleteThis comment has been removed by a blog administrator.
ReplyDeleteThanks for the tutorial on how to creating in colorfill toy in silverlight. Ii really like this one because its new for me. I think this will help me to learn more about this one. Keep adding more about this.
ReplyDeleteweb design quote
Nice collection..Thanks
ReplyDeleteIt is helpful tutorial for me.
ReplyDeleteThanks for sharing.
You have done a great work thanks a lot...
ReplyDelete